Cloudflare R2 CORS Setup
Configure Cross-Origin Resource Sharing to allow your app to communicate with your R2 bucket.
Step 1Verify Requirement
Before using the file upload features of the application, you must configure the CORS rules for your Cloudflare R2 bucket. This enables your browser to upload files directly to the storage bucket securely.
Step 2Login to Cloudflare
Navigate to dash.cloudflare.com and sign in to your account.
Step 3Access Search
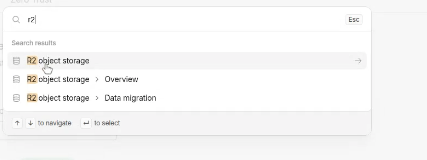
Locate and click the search bar at the top of the dashboard (or press Cmd+K / Ctrl+K).
Step 4Navigate to R2
Type "R2" in the search box and select "R2 Object Storage" from the results required to open the R2 management UI.
Step 5Ensure Bucket Exists
You should already have a bucket created for this project. If not, create one now.

Step 6Open Bucket
Click on the specific bucket you are using for this application (e.g., nodejs-starter-bucket) to view its details.

Step 7Go to Settings
Navigate to the "Settings" tab near the top of the bucket details page.

Step 8Find CORS Policy
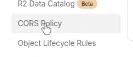
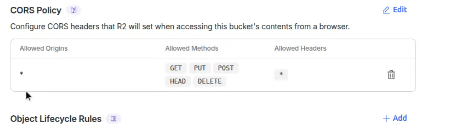
Scroll down or use the sidebar navigation to find the "CORS Policy" section.
Step 9Edit Policy
If a policy exists, click "Edit". If not, look for an "Add CORS Policy" button. This will open a code editor window.

Step 10Configure Allowed AllowOrigins
In the AllowedOrigins array, define which domains can access your bucket.
For development or testing, you can use "*" to allow all domains (less secure).
For production, rigorously specify your deployed application's URL (e.g., "https://my-app.railway.app").
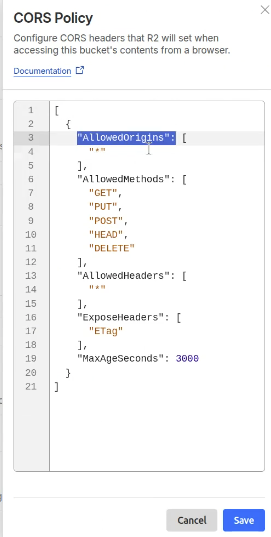
Step 11Final Check
Crucial: Do NOT add a trailing slash (/) at the end of your domain URL in the allowed origins list. Click "Save" to apply the changes.